We're taking extra measures to ensure your children are safe. Learn More

SERVO CONTROL HAT RESOURCES
Control Servos With Your Raspberry Pi
Without Wiring
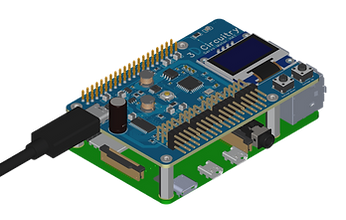
The Servo Control Hat uses a PCA9685 chip to control 16 servos using the I2C bus. No wiring required and the HAT is stackable with itself so you can control 100s of servos with only one Pi.
Learn how to setup the hardware, control the motor, synchronize LEDs, and start building your own effects.

.png)

Raspberry Pi
Compatible

SK9822
LEDs

PCA9685
Motor Driver

Python
Ready
Full Video Guide
Get up and running with your Servo Control HAT in one complete walkthrough. This video covers everything from assembling the HAT and connecting your servos to installing the required libraries, programming servo movement, and using all of the board's features. Whether you're just getting started or building your next robotics project, this guide has you covered from start to finish.
Assembly
Step 1
Start by screwing the threaded hex spacers to the top and bottom of the 4 holes located on the pi.


Step 2

Attach the metal plate to the bottom side of the pi.
Libraries to Install
WARNING: It is necessary to mount the 3d display to the base or to a heavy surface. Otherwise the display can become unstable and injure.
Step 1
Start by screwing the threaded hex spacers to the top and bottom of the 4 holes located on the pi.
Attaching Servos
Step 1
Start by screwing the threaded hex spacers to the top and bottom of the 4 holes located on the pi.
Step 2
Attach the metal plate to the bottom side of the pi.
Step 3
Push the 3d display hat onto the pi and tighten the 4 nuts to the hex spacers.
Creating a 3D Dot
WARNING: It is necessary to mount the 3d display to the base or to a heavy surface. Otherwise the display can become unstable and injure.
Step 1
Start by screwing the threaded hex spacers to the top and bottom of the 4 holes located on the pi.
Creating a Square
WARNING: It is necessary to mount the 3d display to the base or to a heavy surface. Otherwise the display can become unstable and injure.
Step 1
Start by screwing the threaded hex spacers to the top and bottom of the 4 holes located on the pi.
Schematic
